Efficient Guide: How to Install Door Closer Successfully

Ever wrestled with a door that slams shut with the subtlety of an earthquake? Or maybe you've dealt with one that takes its sweet time to close, like molasses on a cold day?
Well, folks - I've been there too. And let me tell you: it's not just irritating but also downright hazardous at times.
You see, as someone who appreciates tranquillity and safety in equal measures, I realised what was missing: A trusty door closer. These handy devices can turn any raucous door into an obedient servant - shutting when told and opening up without kicking up a fuss.
What's the real gem here? It's simpler than assembling flat-pack furniture! But, you might wonder, how do we tackle this seemingly daunting task of installing a door closer? Don't worry. This guide is your handy companion to help choose the right door closer and walk you through each step of installation.
Table Of Contents:
- Understanding Door Closers
- Selecting the Right Door Closer
- Preparing for Installation
- Installing the Door Closer
- Adjusting Door Closer Speed
- Maintaining Your Door Closer
- When to Consult a Professional
- FAQs in Relation to How to Install Door Closer
- Conclusion
Understanding Door Closers
Door closers are integral components in the world of security, both for commercial and residential properties. Their primary function is to prevent doors from being slammed against walls, hence protecting your property's structural integrity.
Types of Door Closers
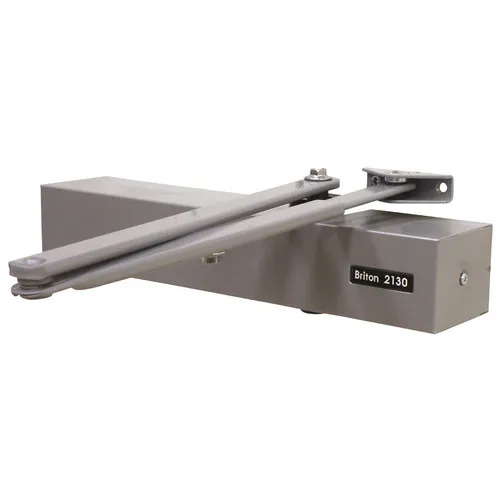
In the realm of door closers, diversity is key. There are various types of closers such as heavy-duty models designed for high traffic areas like office buildings or hospitals. Medium-duty variants can be used in less busy spaces but still need durability while light-duty versions fit perfectly into low-traffic areas.
Besides these three categories, we also have electromagnetic door closers which hold doors open during normal operation but close when activated by a fire alarm system; concealed ones that blend seamlessly with your interior design because they're hidden within the door frame; and floor springs offering an aesthetic alternative due to their placement at ground level.
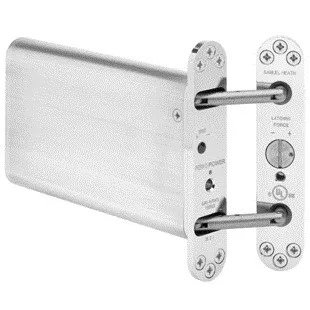
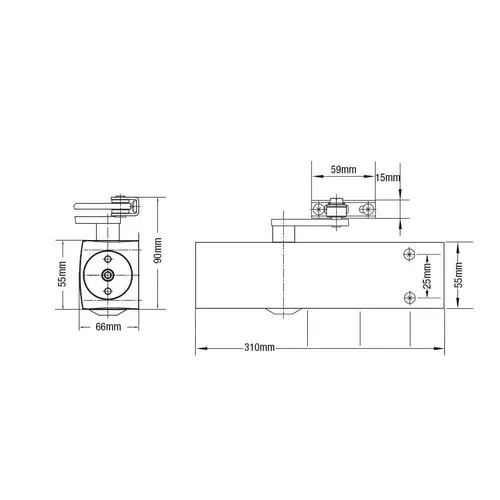
Components of a Door Closer
The heart of any automatic door closer is its 'closer body', responsible for controlling closing speed and ensuring smooth operation every time you use it. The arm shoe connects this body to the actual structure – be it a wall or overhead fixture - allowing it precise movement whilst maintaining strength throughout its cycle.
Aesthetics matter too. This brings us to our third main component: cover caps not only add visual appeal but also protect internal mechanisms from dust accumulation thereby extending lifespan significantly.
We often take them for granted but door closers, including those like automatic ones concealed within structures (such as overheads), serve crucial roles around homes care facilities alike saving potential repair costs through constant slamming force reduction.
Selecting the Right Door Closer

Choosing a suitable door closer isn't just about picking one off the shelf. It's a process that requires some thought and consideration, especially given how it impacts both functionality and safety of your property.
Considerations for Choosing a Door Closer
You need to think about factors like type of building, frequency of use, weight of the door, among others. Let's delve into these considerations.
The type of building is crucial in selecting an appropriate door closer. Commercial properties such as office buildings often have doors that are used frequently and therefore might benefit from heavy-duty automatic closers. On the other hand, residential properties may require less intensive usage so something light duty could be more fitting.
Frequency plays its part too – if you have doors which see constant traffic throughout the day (like those in commercial buildings), you'd want to select a robust model designed for endurance under frequent use. In contrast, lesser-used doors in homes or small offices can function well with lighter models.
Last but not least comes weight – this relates directly to what sort of force will be required by your chosen device to properly close your particular door at room temperature without slamming shut or remaining partially open after being used - no one wants drafty corridors now do they?
To aid this selection process, Smart Choice Security, has curated top-selling options based on customer reviews: The Arrone 1500 silver overhead door closer and Rutland antique brass overhead door closer are amongst them.
Your Perfect Solution Awaits
Finding the perfect solution can seem daunting; there’s quite literally plenty out there. But fear not my friend, by considering the aforementioned factors and doing a bit of research on what’s out there – you’ll have your doors closing smoothly in no time.
And remember, it's not just about finding any door closer - it's about finding your door closer.
Choosing the right door closer isn't a one-size-fits-all process. You've got to consider your building type, door usage frequency and weight. For heavy-duty needs, go for robust models; lighter ones suit less frequent use. Remember - it's about finding not just any door closer, but your perfect fit.
Preparing for Installation
The first step in a successful door closer installation is gathering all the necessary tools. Having everything at hand will make the process smoother and more efficient.
Tools Required for Installation
You'll need to get your hands on some specific equipment. A drill, screws, screwdriver, and level are fundamental to this DIY project. Each tool has its own role in ensuring your door closer fits perfectly onto your chosen door.
- A Drill: This helps you create pilot holes in both the door frame and where you plan to mount the closer body.
- Screws: Screws supplied by manufacturers keep things tight and secure when installing any type of automatic door closer mechanism.
- Screwdriver: Whether manual or electric, it's vital for securing screws during installations like these.
- A Level: Crucial to ensure that both your drilling points and the final installed product align correctly with room temperature accuracy (or better).
In addition, a paper template might be included with certain models of closers - if so, use them. They can simplify positioning greatly because they're custom-made as an installation guide tailored specifically for each model of overhead or concealed door closers available on the market today.
If you don't have these items already at home but are eager about taking up such tasks yourself rather than calling professionals, then smart choice security Experts Blog offers an excellent guide. It includes details about what exactly is needed along with helpful tips, which makes doing it yourself a less daunting task, even if it’s just a light-duty door closer to your home.
It's always sensible to read the producer's directions prior to beginning. Different models of automatic doors may need additional tools or steps for installation. Don't rush - a careful read can save time and hassle in the long run, giving you that perfect solution every homeowner desires: a well-installed door closer that works perfectly.
For a successful door closer installation, make sure you have all the necessary tools - a drill, screws, screwdriver and level. These help in creating pilot holes, securing the mechanism and ensuring correct alignment. Using any provided paper template can also simplify positioning greatly. Always check manufacturer's instructions before starting as different models may need additional steps or tools.
Installing the Door Closer
Bearing the necessary tools, you are now primed to begin your installation. Let's start with the closer body.
Attaching the Closer Body
The first step in installing a door closer is attaching the closer body to either your door or frame. This is where our trusty friend, Mr Drill Bit comes into play. Start by marking holes using your installation template - it's like a treasure map leading you to a perfectly installed door.
You then need to drill pilot holes, which are simply smaller guide-holes that help make sure our screws go in straight and secure (think of them as tiny traffic directors for your screws). With those drilled, attach the closer body using supplied screws.
Adjusting Position of Door Closer
Nailing down correct positioning is vital because we want more than just any old closing speed; we’re after perfect closure every time. So once you've got that pesky arm shoe attached, adjusting its position will allow us not only smooth but also controlled opening and closing – from common doors in residential properties up to heavy-duty ones in commercial buildings.
This may sound daunting, but think about it like tuning an instrument: small tweaks here and there until everything sounds pitch-perfect. Just remember though - Rome wasn't built in a day. It might take some tinkering before things work properly.
A couple tips on making these adjustments? Make sure room temperature doesn’t affect performance too much – nobody likes fiddling around with settings when they could be enjoying their newly quietened living space instead. And if anything seems off even after adjusting, it’s probably best to ask for professional help. Even the most seasoned DIYers know when to call in reinforcements.
That's it. You've just installed a door closer. So give yourself a pat on the back - and enjoy that satisfying 'click' every time your door closes smoothly and quietly behind you.
Ready to tackle a DIY project? Start by attaching the door closer body using your drill and screwdriver, guided by an installation template. Drill pilot holes for straight and secure screws, then adjust the position of the arm shoe for smooth opening and closing. Don't rush - perfection might need some tweaking. Remember: if you're stuck, don't hesitate to ask for help. It's always better to get advice than struggle alone; even experienced DIYers sometimes hit roadblocks.
Adjusting Door Closer Speed
By altering the speed of a door closer, it is possible to tailor it to suit particular requirements and thereby guarantee that doors shut securely, which can be especially beneficial in areas with extreme weather conditions. This is crucial in ensuring that doors close completely, thus conserving energy, particularly in areas with extreme climates.
Why Adjust the Closing Speed?
If you've ever been caught by a fast-closing door or left waiting for what seems like an eternity for a slow one to shut, then you'll understand the importance of adjusting your door closer's speed. It’s not just about convenience; it also reduces wear and tear on the mechanism itself and helps maintain room temperature - all contributing towards reducing costs as mentioned by The Simple Dollar.
How To Adjust Your Door Closer Speed
You’ll need to adjust two types of speeds: sweep speed (the majority of closing) and latch speed (final 10 degrees). You’ll typically find adjustment screws on your closer body for these purposes.
- To adjust sweep speed: Turn the screw clockwise to make it slower or anti-clockwise if you want faster closure.
- To change latch speed: Similar approach here too. Clockwise slows down while anti-clockwise quickens things up.
This might seem tricky but don't worry - we have got some pro tips from our experience at Smart Choice Security.
Tips For Perfect Adjustment:
- Always start small – half turns usually work best until you get comfortable with how much each turn affects closing time.
- Avoid over-tightening screws as this could damage internal components.
- Fine-tuning might take a few attempts. It’s all part of the process so be patient.
Remember, there's no universal 'correct' closing speed - it depends on your specific needs and conditions. For example, in office buildings or commercial properties with heavy foot traffic, you might prefer faster closure to maintain room temperature and energy efficiency.
Maintaining Adjusted Speed
Make sure to regularly check if the door is closing as expected. This is important because weather changes can impact its performance. Remember, a well-adjusted closer not only gives you convenience but also keeps you safe.
Adjusting your door closer's speed isn't just about convenience, but it also reduces wear and tear on the mechanism itself and helps maintain room temperature. To get this right, you'll need to tweak two types of speeds: sweep speed and latch speed. Remember, always start small with adjustments - half turns usually work best until you're comfortable. Keep an eye on how these changes impact your door's performance to ensure it closes smoothly every time.
Maintaining Your Door Closer
Like any other mechanical device, a door closer needs regular care to keep it in top shape. Proper maintenance and periodic inspection are vital for ensuring your installed door closer performs at its best.
Troubleshooting Common Issues
Door closers can present several common issues which you might be able to fix yourself. One typical problem is the closing speed; if your door slams shut or takes an age to close, this indicates that adjustment is needed. A simple tweak of the adjusting screw should get things back on track - but remember, righty-tighty increases the tension while lefty-loosey reduces it.
A leaking hydraulic fluid signifies more serious trouble though; this usually means that seals within the unit have failed. It's like finding oil under your car – not good news. In such cases, replacing the entire unit could be necessary.
Sometimes however, issues may arise due to incorrect installation rather than wear and tear or defects with the product itself. This helpful guide walks through some steps you can take when troubleshooting these problems.
Routine Maintenance Tasks
You wouldn't run a car without regular servicing would you? Same goes for maintaining a door closer. Regular checks ensure they work as intended by keeping doors secure and helping control room temperature by preventing drafts.
This involves tasks like checking screws for tightness - loose ones will let your closer wobble about making performance inconsistent. The rule of thumb here: "If it moves but shouldn't – use duct tape."
| Maintenance Task | Frequency |
|---|---|
| Check screws for tightness. | Monthly |
| Clean door closer surface to remove dust and grime. | Here are some cleaning tips you can use. |
When to Consult a Professional
Although installing and adjusting a door closer can be an exciting DIY project, there are times when you might need professional help. This isn't just about making your life easier; it's also about ensuring the safety of everyone who uses the door.
One such instance is when you're dealing with commercial properties or office buildings where doors are heavier than those in residential properties. A misstep during installation could lead to damage or even injuries. Here, getting assistance from professionals trained for these tasks would be prudent.
A common issue faced by many while trying to install a door closer is difficulty in drilling pilot holes accurately. These small guide holes are crucial as they prevent splitting or damaging the material when driving screws into it. The slightest error here could result in an unstable installation which might cause your door not only close improperly but also potentially become hazardous over time.
Maintaining Your Door Closer
Maintenance of your installed device is another aspect that sometimes requires professional input - especially if something goes wrong despite following manufacturer's instructions correctly and doing regular checks on how smoothly your automatic door closes.
In some cases, users struggle with their adjustment efforts because closing speed seems off no matter what tweaks they make using their screwdriver level tool – yet another sign that perhaps consulting someone more experienced would be beneficial at this stage.
Finding Professional Help
The question then becomes: "Where do I find such professional help?" One great resource is Smart Choice Security. They offer expert services including guidance on choosing suitable products for both commercial buildings and residential homes alike based on room temperature considerations among other factors.
For further questions or if you're unsure about whether your door closer is working properly, don't hesitate to contact them. They can provide expert insights and help ensure that your installed device serves its purpose effectively while maintaining a comfortable environment in your space.
In conclusion, it's entirely doable for someone with basic DIY skills to fit a door closer by using the provided screws and adhering to an installation template guide. However, when discussing utilisation in a commercial context, matters can become more intricate.
needs, consider asking a professional. They can guide you on the best door closer options for your specific situation. Their expert knowledge can ensure that you make a safe and effective choice, avoiding potential damage or injury from improper installation or maintenance.
FAQs in Relation to How to Install Door Closer
How do you install a simple door closer?
You attach the body to the frame, fix the arm and shoe onto your door. Then adjust its position for smooth operation.
What is the correct position for door closers?
The right spot depends on your type of closer - overhead ones go at the top while concealed ones are fitted inside doors or frames.
How much does it cost to install a door closer?
A professional installation could set you back anywhere between £75-£200, but DIY installations only need tools and time.
How long does it take to fit a door closer?
If you're handy with tools, fitting can be done in about 30 minutes to an hour tops.
Conclusion
Well, we've walked quite a path together, haven't we? By now you should know how to install door closer effectively. From understanding the various types of door closers and their components to selecting the right one for your needs.
We went on to explore all the tools required for installation, didn't we? Then got our hands dirty by drilling pilot holes and adjusting that stubborn closing speed until it was just right!
Remember: regular maintenance is key. And if things get tricky - there's no shame in calling up a professional.
I trust this manual has been as advantageous as desired! Go forth with confidence - make every door close at your command!